
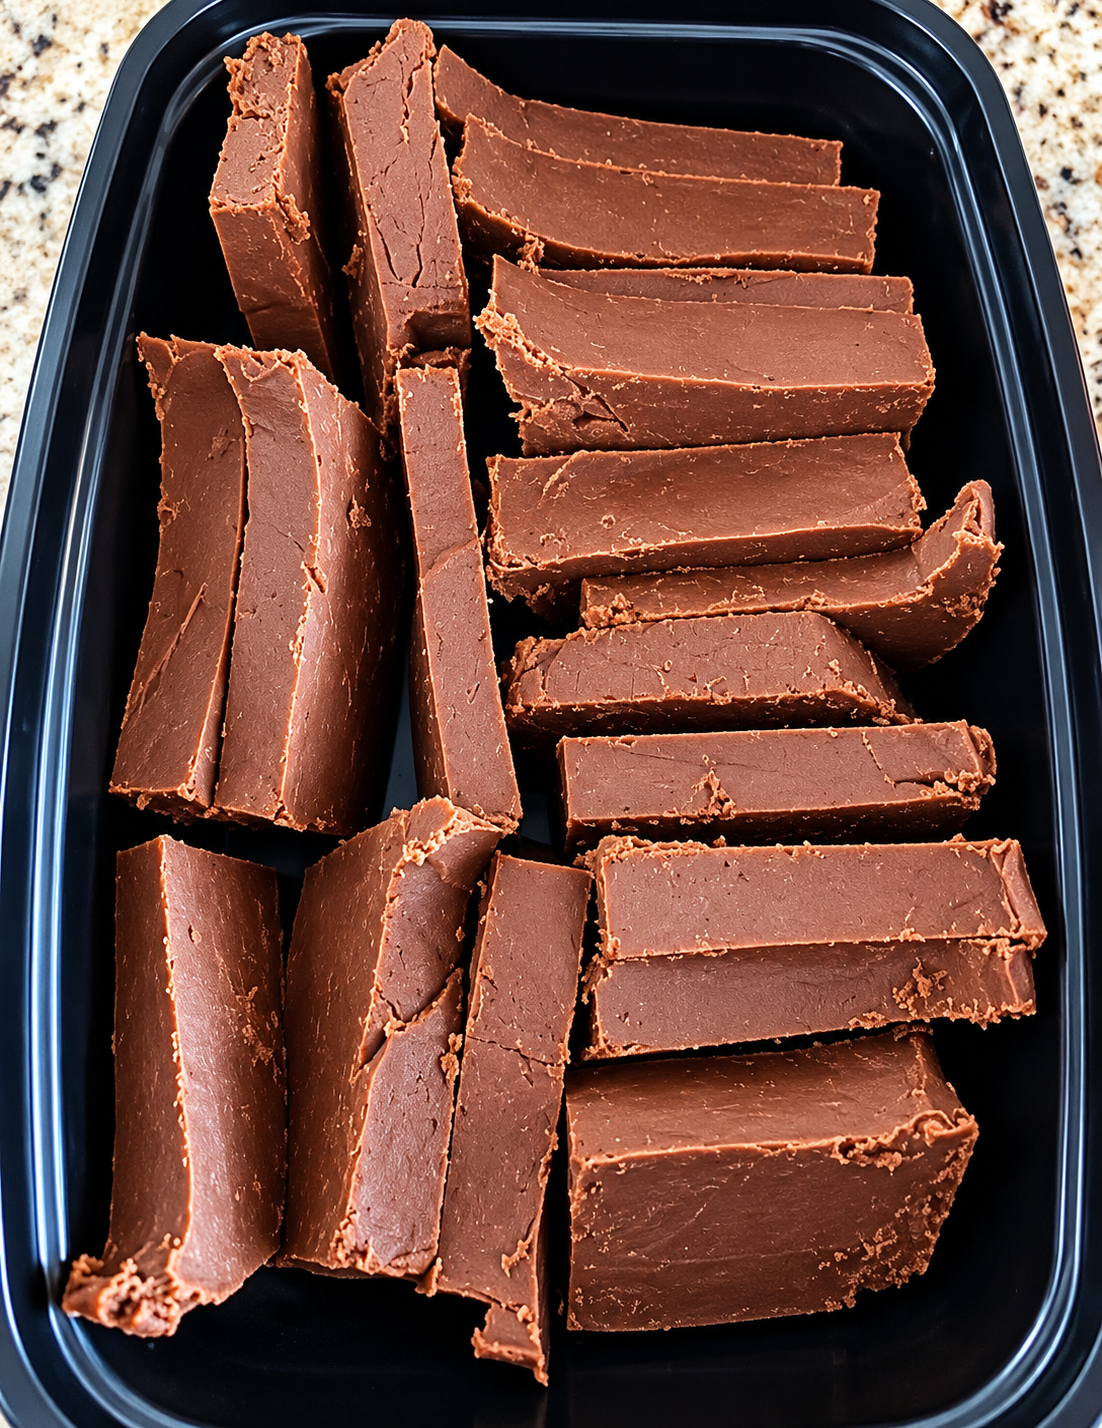
Easy, Rich & Creamy Homemade Fudge
Some recipes bring back childhood memories with just one bite. This Aunt Bill’s Fudge is one of those special treats—a rich, chocolatey homemade fudge that is nearly impossible to resist. After finally getting the recipe from her mother, one home cook made three batches because everyone loved it so much!
Interestingly, what seemed like a treasured family recipe turned out to be a well-known fudge recipe rather than one invented by a relative named Aunt Bill. Regardless of its origins, this delicious chocolate treat has earned its place in the family recipe collection.
Made with butter, sugar, evaporated milk, semi-sweet chocolate chips, marshmallow fluff, and vanilla, this fudge delivers a smooth, sweet, chocolate-rich flavor with a wonderfully creamy texture. Best of all, you don’t need a long list of ingredients or complicated techniques to make it.
Whether you’re preparing Christmas candy, assembling homemade holiday gift boxes, or simply craving an old-fashioned chocolate treat, this easy Aunt Bill’s Fudge deserves a spot in your kitchen.
Why You’ll Love This Aunt Bill’s Fudge Recipe
A nostalgic favorite: This recipe brings back the kind of childhood memories that make homemade sweets so special.
Simple ingredients: You only need seven everyday ingredients to create a rich, chocolatey dessert.
Creamy and chocolatey: Semi-sweet chocolate chips balance the sweetness while butter and marshmallow fluff contribute to the fudge’s rich texture.
Perfect for sharing: Cut the fudge into small squares for holiday parties, family gatherings, bake sales, or homemade gifts.
Great for making ahead: Fudge needs several hours to chill and set, making it a convenient dessert to prepare before a celebration.
Easy to make in batches: If your family loves it as much as this one does, making an extra batch might be a very good idea!
What Is Aunt Bill’s Fudge?
Aunt Bill’s Fudge is a classic American-style chocolate fudge recipe known for its rich sweetness and smooth texture. Versions of this well-known recipe have been shared for generations, particularly around the holidays.
Although the name sounds as if it belongs to a family heirloom, the recipe has a history beyond any one household. That’s part of its charm: a familiar dessert can become a beloved family tradition even when its original creator is someone else.
This version uses semi-sweet chocolate chips and marshmallow fluff to create a delicious chocolate confection without requiring you to temper chocolate.
The butter, sugar, and evaporated milk are boiled together before the chocolate and marshmallow fluff are added. After the mixture is poured into a prepared pan and chilled, it becomes firm enough to cut into neat squares.
The result is a classic homemade fudge that feels special enough for Christmas but is delicious any time of year.
Ingredients for My Mom’s Aunt Bill’s Fudge
You’ll need just seven ingredients to make this rich chocolate treat.
- ¾ cup unsalted butter: Adds richness and helps create a smooth, creamy fudge. Unsalted butter gives you better control over the overall flavor.
- 2½ cups granulated sugar: Provides the sweetness and structure needed for the fudge to set properly.
- ⅔ cup evaporated milk: Adds dairy richness and helps the sugar mixture cook into the right consistency. Use evaporated milk, not sweetened condensed milk, because the two products are not interchangeable.
- One 12-ounce bag of semi-sweet chocolate chips: Provides the main chocolate flavor. Semi-sweet chocolate offers a nice balance against the sugar and marshmallow fluff.
- 7 ounces marshmallow fluff: Helps create the smooth texture that makes this fudge so appealing. Use marshmallow fluff rather than whole marshmallows unless you are following a recipe specifically designed for that substitution.
- 1 teaspoon vanilla extract: Adds warmth and rounds out the chocolate flavor.
Why Use Marshmallow Fluff?
Marshmallow fluff is an important ingredient in this recipe. It helps give the fudge its smooth, creamy texture and makes the mixture easier to prepare than some traditional fudge recipes that rely on precise sugar crystallization.
For the best results, measure the marshmallow fluff carefully and add it after removing the saucepan from the heat.
How to Make My Mom’s Aunt Bill’s Fudge
Follow these simple steps to make a batch of rich, homemade chocolate fudge.
Step 1: Prepare the Baking Dish
Line a 9-by-9-inch baking dish with aluminum foil, leaving enough foil hanging over the sides to help lift the fudge out later.
Lightly coat the foil with cooking spray.
Preparing the pan before you start cooking is important because the fudge mixture will need to be transferred while it is still warm and easy to pour.
Step 2: Combine the Butter, Sugar, and Evaporated Milk
Place the unsalted butter, granulated sugar, and evaporated milk in a medium-to-large saucepan.
Set the saucepan over high heat and whisk frequently as the butter melts and the sugar begins to dissolve.
Continue heating until the mixture reaches a full, rolling boil.
Use a saucepan with enough room for the mixture to bubble without overflowing. Hot sugar mixtures can cause serious burns, so handle the pan carefully and keep children away from the stove during this step.
Step 3: Boil for Five Minutes
Once the mixture reaches a full boil, reduce the heat to medium.
Continue boiling for five minutes, whisking often to keep the mixture evenly combined.
Maintain a steady boil rather than allowing the mixture to simmer too gently. The cooking process helps the sugar mixture develop the consistency needed for the finished fudge.
Because stovetop temperatures and saucepan sizes vary, pay attention to the mixture throughout this step. Avoid leaving it unattended.
Step 4: Add the Chocolate Chips
After five minutes, remove the saucepan from the heat.
Immediately add the semi-sweet chocolate chips and whisk until they have melted completely into the hot mixture.
The residual heat should melt the chocolate and create a smooth, rich chocolate base.
If a few chips remain unmelted, continue whisking gently until the mixture is uniform.
Step 5: Stir in the Marshmallow Fluff and Vanilla
Add the marshmallow fluff and vanilla extract.
Whisk until the marshmallow fluff is fully incorporated and the mixture looks thick, glossy, and evenly chocolate-colored.
Make sure there are no large streaks of marshmallow fluff remaining. The mixture will be quite hot, so avoid splashing it while stirring.
Step 6: Pour Into the Prepared Pan
Carefully pour the warm fudge mixture into the prepared 9-by-9-inch baking dish.
Use a heat-resistant spatula to scrape the remaining fudge from the saucepan and spread the mixture into an even layer.
Gently smooth the surface so the fudge will have a uniform thickness once it sets.
Step 7: Chill Until Firm
Allow the fudge to cool slightly, then place the pan in the refrigerator.
Chill for several hours, or until the fudge is firm enough to slice cleanly.
For the neatest squares, wait until the center is completely set before cutting. If the fudge is still soft, give it additional time in the refrigerator.
Step 8: Slice and Serve
Once the fudge is firm, use the foil overhang to lift it out of the pan.
Place it on a cutting board and carefully peel away the foil.
Cut into small squares with a sharp knife. For cleaner cuts, warm the knife under hot water, dry it thoroughly, and wipe it between slices.
Serve immediately or arrange the pieces in an airtight container for later.
Don’t be surprised if people keep returning for another piece!
Tips for the Best Homemade Fudge
Prepare everything before cooking. Once the sugar mixture has finished boiling, you’ll need to work promptly. Measure the chocolate chips, marshmallow fluff, and vanilla before you begin.
Use evaporated milk, not condensed milk. Sweetened condensed milk contains added sugar and will change the recipe’s proportions and final texture.
Boil for the full five minutes. The recipe calls for five minutes at a steady boil after reducing the heat to medium. Undercooking can affect how firmly the fudge sets.
Use a sufficiently large saucepan. The mixture bubbles as it boils, and a larger pan helps reduce the risk of overflowing.
Whisk thoroughly after adding the chocolate. Make sure the chocolate chips melt completely before adding the marshmallow fluff.
Don’t skip the marshmallow fluff. It contributes to the smooth, creamy texture of this particular recipe.
Line the pan with foil. The foil makes it much easier to remove the entire block of fudge for cutting.
Give it enough time to chill. Fudge that hasn’t fully set can be sticky and difficult to slice. Several hours in the refrigerator will help it firm up.
Use caution around hot sugar. Boiling sugar mixtures are extremely hot and can stick to the skin. Keep your hands and face away from splashes, and never taste the mixture while it is hot.
Common Mistakes to Avoid
Not Boiling the Mixture Long Enough
The butter, sugar, and evaporated milk mixture needs to boil for the full five minutes specified in the recipe. If the mixture is not cooked sufficiently, the fudge may remain too soft.
Allowing the Mixture to Burn
High heat is used to bring the mixture to a boil, but the heat should be reduced to medium once boiling begins. Stir frequently and monitor the saucepan carefully.
If the mixture develops a burnt smell or dark scorched spots, it may be difficult to salvage the flavor.
Adding the Chocolate While the Pan Is Still on the Heat
The recipe instructs you to remove the saucepan from the heat before adding the chocolate chips. This allows the residual heat to melt the chocolate without exposing it to unnecessary direct heat.
Not Mixing in the Marshmallow Fluff Completely
Large streaks of marshmallow fluff can create an uneven texture. Whisk thoroughly until the mixture is smooth and uniform.
Cutting the Fudge Too Soon
Fudge needs time to cool and set. Cutting it before it has firmed up can result in messy, uneven squares.
Using a Different Pan Size Without Adjusting
The original recipe uses a 9-by-9-inch baking dish. A much larger pan will produce thinner fudge, while a smaller pan will create thicker pieces that may take longer to chill.
Delicious Ways to Customize Aunt Bill’s Fudge
The original recipe is delicious as written, but you can experiment with a few additions if you’d like to create a variation.
- Chopped pecans or walnuts: Stir in a small handful of chopped nuts for a little crunch.
- Chocolate and peanut butter: Add a peanut butter swirl on top before the fudge sets.
- Holiday fudge: Decorate the top with festive sprinkles while the mixture is still soft.
- A touch of espresso: A small amount of instant espresso powder can enhance the chocolate flavor without making the fudge taste strongly of coffee.
- Sea salt finish: Sprinkle a small amount of flaky sea salt over the surface for a sweet-and-salty contrast.
- White chocolate drizzle: Once the fudge has set, drizzle melted white chocolate over the top for a decorative finish.
If you add extra ingredients, avoid changing the proportions of the butter, sugar, evaporated milk, chocolate chips, and marshmallow fluff unless you’re following a tested variation. Too many additions can affect the fudge’s texture.
How to Cut Fudge Into Perfect Squares
Homemade fudge can be easy to cut when it is properly chilled.
First, make sure the entire block is firm. Lift it out of the pan using the foil overhang and remove the foil carefully.
Use a long, sharp knife to cut the fudge into strips, then cut across those strips to form squares.
For cleaner edges, warm the knife with hot water, dry it completely, and wipe it clean between cuts.
You can make small pieces for a holiday candy platter or larger squares for a more generous serving. Because this fudge is rich and sweet, smaller pieces are often ideal for sharing.
How to Store Aunt Bill’s Fudge
In the refrigerator: Store the fudge in an airtight container in the refrigerator. Separate layers with parchment paper to help prevent sticking. Refrigeration helps it maintain a firm texture.
At room temperature: If you prefer softer fudge, individual pieces can be brought to room temperature before serving. Because this recipe contains dairy ingredients and its exact shelf stability has not been tested, refrigeration is the safest storage choice for longer keeping.
In the freezer: For longer storage, wrap the fudge tightly and place it in a freezer-safe airtight container. Separate layers with parchment paper. Thaw it in the refrigerator before serving to help minimize condensation.
For gifting: Arrange fully set pieces in a food-safe container or candy box. Keep them cool during transport, especially if the weather is warm.
Always discard fudge that develops an unusual odor, visible mold, or other signs of spoilage.
Can You Make Aunt Bill’s Fudge Ahead of Time?
Yes! This is an excellent make-ahead treat because it needs several hours to chill before serving.
You can prepare it a day or two before a party, holiday gathering, or gift exchange. Once it has completely set, cut it into squares and store it in an airtight container in the refrigerator.
Making it ahead also gives you more time to prepare other desserts when you’re hosting.
If you’re preparing several batches, allow each batch enough time to cook and set properly. Don’t rush the chilling process simply because you have more fudge to make.
Frequently Asked Questions
Why is it called Aunt Bill’s Fudge?
Aunt Bill’s Fudge is a familiar name associated with a classic American fudge recipe. Although the name sounds like it refers to a particular relative, the recipe is not necessarily a family invention. This version became a family favorite after being passed along by the cook’s mother.
Why didn’t my fudge set properly?
Fudge that remains too soft may not have been boiled long enough, may not have cooled sufficiently, or may have been affected by inaccurate ingredient measurements. Make sure the mixture reaches a full boil and cooks for the specified five minutes before adding the chocolate and marshmallow fluff.
If the fudge is simply soft because it hasn’t chilled long enough, give it more time in the refrigerator before deciding there is a problem.
Can I use milk chocolate chips instead of semi-sweet?
You can experiment with milk chocolate chips, but the finished fudge will be sweeter and may have a different texture. Semi-sweet chocolate is the specified ingredient and provides a more balanced chocolate flavor.
Can I use sweetened condensed milk instead of evaporated milk?
No, not as a direct substitution. Sweetened condensed milk contains a substantial amount of added sugar, while evaporated milk does not. Replacing one with the other changes the recipe’s sugar balance and may affect the final texture.
Do I need a candy thermometer?
The supplied recipe uses a timed five-minute boil rather than a specified candy-thermometer temperature. Follow the method as written, maintaining a steady boil and stirring frequently. If you choose to use a thermometer, don’t assume that any temperature reading guarantees the same result without a tested temperature target for this particular recipe.
Can I make this fudge without marshmallow fluff?
Marshmallow fluff is an important ingredient in this version because it helps create the desired texture. Omitting it would change the recipe, so use a fudge recipe specifically developed without marshmallow fluff if you need an alternative.
How long does the fudge need to chill?
The recipe recommends several hours in the refrigerator. The exact time depends on the temperature of your refrigerator and the thickness of the fudge. Wait until it is firm throughout before slicing.
Can I double the recipe?
You can make multiple batches, as the original cook did, but making two separate batches is often easier than doubling everything in one saucepan. A larger batch may heat unevenly and require different cooking conditions.
How should I serve homemade fudge?
Cut the fudge into small squares and serve it on a dessert tray, alongside cookies and brownies, or with coffee or hot chocolate. It is also a popular choice for homemade holiday gift boxes.
Can I freeze Aunt Bill’s Fudge?
Yes. Wrap the fudge tightly, store it in a freezer-safe airtight container, and thaw it in the refrigerator before serving. This helps protect its flavor and texture.
A Classic Chocolate Treat Worth Sharing
There’s something special about discovering a recipe you loved as a child and finally learning how to make it yourself. This Aunt Bill’s Fudge is rich, sweet, and wonderfully chocolatey, with a creamy texture that makes it hard to stop at just one piece.
The ingredient list is simple, the method is straightforward, and the result is perfect for sharing with family and friends. Whether you’re making it for Christmas, preparing a homemade gift, or satisfying a chocolate craving, this old-fashioned fudge is a delicious addition to your dessert collection.
Make a batch, let it chill until firm, and cut it into little squares. Just be prepared: if your family is anything like the one that inspired this recipe, one batch might not be enough!
Recipe Card: My Mom’s Aunt Bill’s Fudge
Prep Time: About 10 minutes
Cook Time: 5 minutes of boiling, plus time to melt and mix
Chilling Time: Several hours
Pan Size: 9 × 9 inches
Yield: Approximately 36 small squares, depending on how you cut them
Ingredients
- ¾ cup unsalted butter
- 2½ cups granulated sugar
- ⅔ cup evaporated milk
- 1 (12-ounce) bag semi-sweet chocolate chips
- 7 ounces marshmallow fluff
- 1 teaspoon vanilla extract
Instructions
- Line a 9-by-9-inch baking dish with aluminum foil and lightly coat it with cooking spray.
- Place the butter, sugar, and evaporated milk in a saucepan over high heat, whisking frequently until the mixture reaches a full boil.
- Reduce the heat to medium and boil for five minutes, stirring frequently.
- Remove the saucepan from the heat and whisk in the semi-sweet chocolate chips until completely melted.
- Add the marshmallow fluff and vanilla extract. Whisk until smooth and fully combined.
- Pour the mixture into the prepared baking dish and spread it evenly.
- Refrigerate for several hours, until completely firm.
- Lift the fudge out using the foil, remove the foil, and cut into squares.
Recipe Notes:
- Use evaporated milk, not sweetened condensed milk.
- Prepare the pan and measure all ingredients before cooking.
- Handle the boiling sugar mixture with care.
- Allow the fudge to chill completely before slicing.
- The yield depends on the size of the pieces.