
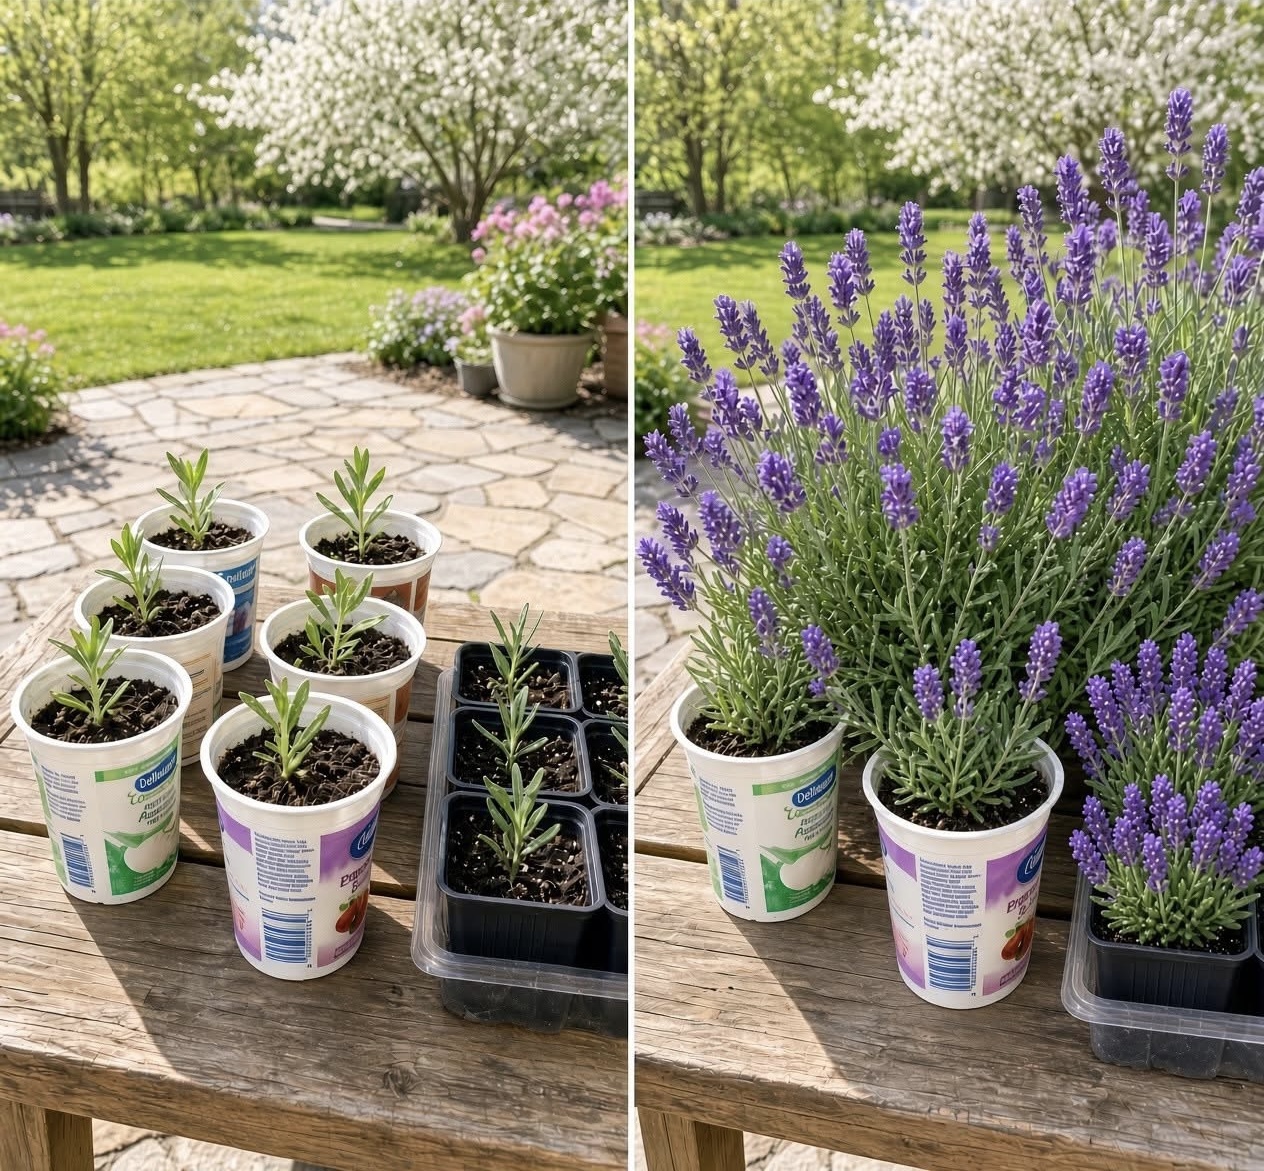
Easy Step-by-Step Guide
Would you love to have more lavender plants without buying several new ones?
The good news is that you can grow additional lavender plants from a healthy plant you already have. One of the easiest ways to do this is by taking stem cuttings and encouraging them to develop their own roots.
With the right cutting, suitable potting mix, and a little patience, you can turn a single lavender plant into several new plants for your garden, containers, or flower borders.
The secret to successful lavender propagation is choosing healthy stems and keeping the rooting medium moist but never waterlogged.
In this guide, you’ll learn when to take lavender cuttings, how to prepare them, what soil to use, how to encourage root development, and when to transplant your new plants.
Why Propagate Lavender From Cuttings?
Lavender is a popular garden plant because of its fragrant foliage, beautiful flowers, and ability to attract pollinators.
However, buying several established lavender plants can become expensive, especially if you’re planning a long border or a fragrant garden path.
Propagating lavender from cuttings gives you an affordable way to grow more plants from a healthy parent plant.
There are several advantages.
1. Grow More Plants for Less Money
You don’t need to purchase a new lavender plant every time you want to fill another pot or garden bed.
With a healthy parent plant, suitable growing conditions, and clean tools, you can take multiple cuttings and attempt to root them.
Not every cutting will necessarily survive, but taking several healthy cuttings gives you more opportunities for success.
2. Keep the Characteristics of Your Favorite Plant
Stem cuttings are clones of the parent plant.
That means a cutting taken from a named lavender variety generally retains the parent plant’s characteristics, including flower color, fragrance, and growth habit.
Plants grown from seed can vary, particularly when they come from hybrids or selected cultivars.
Utah State University Extension notes that lavender is commonly propagated from established plants using cuttings. (Utah State University Extension)
3. Fill Your Garden With Lavender
Once your cuttings have developed healthy roots and become established plants, you can use them to create a fragrant border, line a walkway, fill containers, or expand a pollinator-friendly garden.
Just remember that lavender needs plenty of sunlight and well-drained soil to thrive after transplanting.
When Is the Best Time to Propagate Lavender?
The best time to take lavender cuttings is generally during the active growing season, particularly late spring and early summer when fresh growth is available.
At this stage, the plant produces new shoots that can develop roots under suitable conditions.
Late-summer cuttings may also work, depending on your climate, the lavender variety, and how mature the stems have become.
Softwood Cuttings
Softwood cuttings come from fresh, flexible growth.
They are commonly taken in late spring or early summer and can root relatively quickly when provided with suitable conditions.
However, very soft shoots can wilt easily before they develop roots.
Semi-Hardwood Cuttings
Semi-hardwood cuttings come from newer stems that have begun to firm up.
These are often taken later in the growing season.
They may take longer to root, but firmer stems can be easier to handle.
Which Should Beginners Choose?
If you’re new to propagation, start with healthy, fresh, non-flowering shoots during the growing season.
Avoid using very weak stems, diseased growth, or heavily woody old branches.
The most suitable timing varies with the lavender species, local climate, and growing conditions.
What You’ll Need to Propagate Lavender
Before taking your cuttings, gather the following supplies:
- A healthy lavender plant
- Clean, sharp pruning shears or scissors
- Small pots with drainage holes
- A light, well-draining propagation mix
- Perlite or coarse horticultural sand, if needed to improve drainage
- A pencil or small stick for making planting holes
- Rooting hormone, optional
- A clear humidity cover, optional
- Water
You don’t need expensive gardening equipment.
The most important things are healthy plant material, clean tools, and a suitable rooting medium.
Step 1: Choose a Healthy Lavender Plant
Start with a healthy parent plant that has plenty of vigorous growth.
Look for stems that are:
- Green and healthy
- Free from obvious disease or pest damage
- Firm enough to handle without collapsing
- Not carrying open flowers or developing flower spikes
Avoid stems that are brown, severely woody, damaged, or visibly unhealthy.
It’s also best to avoid flowering shoots when possible because the cutting needs to develop roots rather than devote its limited resources to flowering.
If your lavender is currently flowering heavily, look for healthy side shoots that haven’t developed flower buds.
Step 2: Take a 3–4 Inch Cutting
Using clean, sharp pruning shears, take a cutting approximately 3–4 inches long.
Make a clean cut just below a leaf node, where the leaves emerge from the stem.
A clean cut helps prepare the stem for planting without unnecessarily crushing the plant tissue.
Take several cuttings if your parent plant is large and healthy enough to tolerate them.
Don’t remove so much growth that you damage the parent plant or leave it severely depleted.
Step 3: Remove the Lower Leaves
Next, prepare each cutting for planting.
Gently remove the leaves from the lower half to two-thirds of the stem.
Leave several healthy leaves near the top.
Why is this important?
Any leaves buried in the rooting medium can decay, potentially contributing to rot.
Removing the lower leaves also exposes the section of stem that will sit inside the medium.
Handle the cuttings gently so you don’t damage the stem or strip away all the leaves.
Step 4: Use Rooting Hormone if Desired
Rooting hormone is optional, but it may help encourage root development.
If you have a rooting hormone product, apply it to the cut end according to the manufacturer’s instructions.
Use only the recommended amount.
You can still attempt lavender propagation without rooting hormone. Clean cuttings, suitable moisture, warmth, and good drainage remain essential.
Step 5: Prepare a Well-Draining Potting Mix
Lavender does not perform well in persistently wet soil.
This is particularly important during propagation because a cutting without established roots cannot regulate its water uptake as effectively as a mature plant.
Use a light, well-draining rooting medium.
A simple option is a mixture of potting mix and perlite.
You can also use a suitable propagation mix containing coarse horticultural sand.
Avoid dense soil that stays saturated for long periods.
Fill a small pot with drainage holes and moisten the mix lightly before planting.
The medium should hold enough moisture to support root development while allowing excess water to drain away.
Utah State University Extension recommends warm, moist potting soil for lavender cuttings while emphasizing that the medium should remain moist rather than wet. (Utah State University Extension)
Step 6: Plant the Lavender Cutting
Use a pencil or small stick to make a hole in the prepared medium.
Insert the bare lower portion of the cutting into the hole.
Make sure the leaves remain above the surface.
Gently firm the medium around the stem so the cutting stands upright.
Avoid pushing the stem into the mix with excessive force because this can damage the cutting.
If you’re rooting several cuttings in one container, leave enough space between them for air circulation and later transplanting.
Water lightly to settle the medium around the stems.
Allow excess water to drain completely.
Step 7: Provide Warmth and Bright, Indirect Light
After planting, place the cuttings in a warm, sheltered location with bright, indirect light.
Avoid strong direct sunlight while the cuttings are developing roots.
Without an established root system, the stems can lose moisture faster than they can replace it.
A very hot, sunny location can cause the leaves to wilt or dry out.
Utah State University Extension describes approximately 70°F (21°C) as a suitable warm rooting temperature for lavender cuttings. (Utah State University Extension)
You don’t necessarily need a heated greenhouse.
A bright indoor location or sheltered propagation area may work well if temperatures remain suitable.
Step 8: Keep the Medium Moist, Not Soggy
This is one of the most important parts of lavender propagation.
Your cuttings need enough moisture to remain alive while new roots develop.
However, constantly saturated soil can encourage stem and root rot.
Check the medium regularly.
If it is beginning to dry, water lightly as needed.
Don’t automatically water every day without checking the conditions.
The right watering frequency depends on temperature, pot size, airflow, and the type of rooting mix you’re using.
Should You Use a Plastic Bag or Humidity Dome?
A loose clear cover can help reduce moisture loss from the leaves.
However, lavender generally benefits from good drainage and airflow.
If you use a humidity cover, don’t seal the cuttings in a hot, stagnant environment.
Open the cover regularly for ventilation and monitor the medium carefully.
Remove the cover gradually once the cuttings are well rooted and able to tolerate normal conditions.
Step 9: Wait for Roots to Develop
Now comes the part that requires patience.
Lavender cuttings may develop roots in approximately four to six weeks under suitable conditions, although some take longer.
The exact timing depends on the variety, cutting type, temperature, moisture, and growing medium.
Avoid repeatedly pulling the cuttings out of the soil to check for roots.
Instead, gently test a cutting after several weeks by giving it a very light tug.
If it offers resistance, roots may have developed.
New growth can also be encouraging, but new leaves alone don’t always prove that a strong root system has formed.
If a cutting has not rooted after several weeks, continue monitoring it as long as the stem remains healthy.
If the base becomes black, soft, or mushy, the cutting may have rotted.
Step 10: Transplant Your Rooted Lavender Cuttings
Once the cuttings have developed a healthy root system, you can move them into individual pots.
Choose containers with drainage holes and fill them with a well-draining potting mix suitable for lavender.
Carefully remove each rooted cutting without unnecessarily damaging its roots.
Plant it at approximately the same depth it was growing previously.
Water lightly and allow the excess moisture to drain.
Keep the new plants in a sheltered location while they adjust to their new pots.
Don’t immediately expose tender young plants to extreme heat, strong winds, or harsh direct sunlight.
Step 11: Gradually Acclimate the New Plants
Before moving your young lavender plants outdoors permanently, give them time to adjust to the conditions.
Gradually introduce them to outdoor light and airflow.
Start with a sheltered location and increase their exposure over several days.
This process helps reduce transplant stress.
Once established, lavender generally prefers full sun and well-drained soil.
Utah State University Extension recommends planting lavender in a sunny location with light, well-aerated, well-drained soil. (Utah State University Extension)
Choose the planting location carefully because lavender can struggle in heavy, waterlogged ground.
Common Lavender Propagation Mistakes
Even a straightforward propagation project can fail if the cuttings receive the wrong conditions.
Here are some common problems and how to avoid them.
Mistake 1: Using Flowering Stems
Flowering shoots may be less suitable for propagation because the plant is directing resources toward flowers.
Choose healthy, non-flowering shoots whenever possible.
Mistake 2: Keeping the Soil Too Wet
This is a major risk.
Lavender prefers excellent drainage, and cuttings can rot if the rooting medium remains saturated.
Use a light mix, a pot with drainage holes, and careful watering.
Mistake 3: Placing Cuttings in Strong Direct Sunlight
Unrooted cuttings can lose moisture quickly.
Keep them in a bright, sheltered location away from harsh direct sun until roots develop.
Mistake 4: Using Dense Garden Soil
Heavy soil may hold too much moisture around the cutting.
Choose a suitable propagation mix that drains well and allows air to reach the developing roots.
Mistake 5: Checking for Roots Too Often
Repeatedly pulling cuttings out of the medium can damage developing roots.
Wait several weeks before testing for resistance, and do so gently.
Mistake 6: Transplanting Too Early
A cutting may produce new leaves before it has developed a strong root system.
Give it enough time to establish roots before moving it into a larger container.
Can You Propagate Lavender in Water?
Some gardeners experiment with rooting lavender cuttings in water.
However, for a reliable gardening guide, I recommend starting with the soil-based method described above.
A well-draining propagation medium provides support and moisture while allowing air to reach the developing roots.
If you experiment with water propagation, understand that success can vary by lavender variety and conditions. Cuttings rooted in water may also need careful adjustment when transferred to soil.
For beginners, a light propagation mix is a practical starting point.
Is Propagating Lavender Better Than Growing It From Seed?
For many gardeners who want to reproduce a particular lavender plant, cuttings are a convenient option.
Plants grown from cuttings are genetically identical to the parent plant, so named varieties generally retain their characteristic features.
Growing from seed can take longer, and seedlings may vary in their characteristics.
However, seed propagation can still be useful when growing suitable seed varieties or when you want to experiment with different plants.
The best method depends on your goals.
If you want more plants like the lavender you already love, stem cuttings are an excellent option.
Frequently Asked Questions
How long does it take lavender cuttings to root?
Lavender cuttings may root in approximately four to six weeks under suitable conditions. Some take longer depending on the variety, cutting type, temperature, and moisture.
What is the best time to take lavender cuttings?
Late spring to early summer is a common time to take softwood cuttings. Semi-hardwood cuttings can also be taken later in the growing season.
Do lavender cuttings need rooting hormone?
No. Rooting hormone is optional. It may help encourage rooting, but healthy cuttings can sometimes root successfully without it.
Can you grow lavender from a cutting without roots?
Yes. That is the purpose of propagation from cuttings. The stem is planted in a suitable rooting medium and develops its own roots under appropriate conditions.
Why are my lavender cuttings turning black?
Black, soft stems can indicate rot, often associated with excessive moisture, poor drainage, or unsuitable conditions.
Remove badly rotted cuttings and review your watering and growing medium.
Should lavender cuttings be kept in direct sunlight?
No. Until roots develop, bright indirect light is generally safer than strong direct sunlight.
How often should I water lavender cuttings?
There is no universal daily schedule. Check the rooting medium and water when needed to prevent it from drying excessively. Keep it slightly moist rather than saturated.
Can I propagate lavender in autumn?
It is possible, depending on the climate, lavender variety, and cutting maturity. However, late-season cuttings may need more protection and time to establish before cold weather.
Can one lavender plant produce multiple new plants?
Yes. A healthy parent plant can provide several cuttings, although the number you can safely take depends on the plant’s size and condition.
When can I plant lavender cuttings outside?
Wait until the cuttings have developed healthy roots and are growing reliably. Gradually acclimate the young plants to outdoor conditions before planting them in a suitable sunny, well-drained location.
Final Thoughts
Propagating lavender from cuttings is a rewarding way to grow more plants without buying every one from a garden center.
The process is simple: choose a healthy stem, remove the lower leaves, plant it in a well-draining medium, and provide warmth, light, and careful moisture management.
Then give the cutting time to develop roots.
Remember that good drainage is essential. Lavender cuttings need moisture, but they should never sit in waterlogged soil.
With patience and suitable growing conditions, you can turn one healthy lavender plant into several new plants for your garden, containers, or fragrant borders.
And the next time you admire your lavender bush, you may find yourself looking at it a little differently: not just as a beautiful flowering plant, but as the beginning of an entire lavender garden.