
Introduction
Christmas Sugar Cookies are a classic holiday favorite, loved for their buttery flavor, delicate sweetness, and beautiful festive shapes. Made with simple baking ingredients, these cookies have a tender texture and a smooth surface that makes them perfect for decorating with colorful icing, sprinkles, and sparkling sugar. From Christmas trees and snowflakes to stars and candy canes, every cookie can become a little piece of holiday cheer. This easy recipe is ideal for Christmas baking with family and friends. The dough can be prepared ahead of time, chilled, rolled out, and cut into your favorite shapes. Once baked and cooled, the cookies are ready for creative decorating. Whether you are preparing a holiday cookie platter, making edible gifts, or starting a family Christmas tradition, these homemade sugar cookies are a wonderful choice.
Origin and Cultural Significance
Sugar cookies have a long history in American home baking, with early versions influenced by European baking traditions. Over time, they became especially popular for holidays and celebrations because the dough is easy to shape and can be decorated in countless ways. Christmas sugar cookies are now a familiar part of holiday traditions in many American households. Families often gather to roll out dough, cut festive shapes, and decorate cookies with colorful icing and sprinkles. These activities make baking about more than dessert; they create opportunities for creativity, sharing, and lasting family memories. This recipe combines a buttery cookie base with vanilla and a hint of almond extract for a traditional holiday flavor.
Ingredients Quantity
For the Sugar Cookies
- 1 cup salted butter, softened (2 sticks or 226 g)
- 1 cup granulated white sugar (200 g)
- 1 large egg
- 1 tablespoon vanilla extract
- 1/4 teaspoon almond extract
- 2 1/2 cups all-purpose flour (about 310 g)
- 1/2 teaspoon baking powder
- 1/2 teaspoon salt
For Decorating
- Royal icing or your favorite cookie decorating icing
- Red, green, white, and yellow food coloring, as desired
- Christmas sprinkles and nonpareils
- Sanding sugar or edible decorative sugar
- Small candy decorations, optional
Optional Additions
You can easily customize these cookies to create different flavors and designs. A little finely grated orange zest adds a fresh citrus note that pairs beautifully with vanilla. For a warmer holiday flavor, add a small pinch of cinnamon to the dry ingredients. If you prefer a simpler cookie, omit the almond extract and use an additional 1/4 teaspoon of vanilla. You can also sprinkle colored sanding sugar over the cookies before baking for a sparkling finish without needing icing. For a classic decorated look, use royal icing to create detailed snowflakes, Christmas tree branches, and candy cane stripes.
Tips for Success
Use properly softened butter. The butter should be soft enough to press gently with a finger but should not be melted. Softened butter creams more evenly with sugar and helps create a tender cookie.
Measure the flour carefully. Too much flour can make the dough dry and difficult to roll. For the most consistent results, weigh the flour or spoon it lightly into a measuring cup and level it off.
Do not skip chilling the dough. Refrigerating the dough for at least one hour firms up the butter and makes the dough easier to roll. It also helps the cookies hold their shapes during baking.
Roll the dough evenly. Aim for approximately 1/4-inch thickness. Cookies of similar thickness bake more evenly, helping prevent thin edges from browning before the centers are done.
Use lightly floured tools and surfaces. A little flour on the rolling pin and work surface can prevent sticking. Avoid adding too much extra flour, as it can make the cookies tougher.
Keep the dough cool. If the dough becomes soft or sticky while cutting shapes, return it to the refrigerator for 10–15 minutes. Cool dough is easier to handle and helps preserve crisp outlines.
Avoid overbaking. Remove the cookies when the edges are just beginning to turn lightly golden and the centers still look pale. They will continue to firm up as they cool.
Cool completely before decorating. Warm cookies can cause icing to melt, run, or lose its shape. Allow them to cool completely on a wire rack before adding decorations.
Instructions
Step 1: Prepare the Oven and Baking Sheets
Preheat the oven to 350°F (175°C). Line two baking sheets with parchment paper and set them aside. This helps prevent sticking and makes it easier to remove the cookies without damaging their shapes.
Step 2: Cream the Butter and Sugar
In a large mixing bowl, beat the softened salted butter and granulated sugar together for about 2–3 minutes, until the mixture looks light and fluffy. Scrape down the sides of the bowl as needed so the ingredients are evenly combined.
Step 3: Add the Egg and Extracts
Beat in the egg, vanilla extract, and almond extract until the mixture is smooth. The vanilla provides a familiar sweet flavor, while the small amount of almond extract adds a subtle bakery-style aroma.
Step 4: Combine the Dry Ingredients
In a separate bowl, whisk together the all-purpose flour, baking powder, and salt. Mixing these ingredients separately helps distribute the baking powder evenly throughout the dough.
Step 5: Make the Dough
Gradually add the dry ingredients to the butter mixture, mixing on low speed or stirring by hand until a soft dough forms. Stop mixing as soon as the flour is incorporated. The dough should hold together without feeling excessively sticky.
Step 6: Divide and Chill the Dough
Divide the dough into two equal portions and shape each portion into a flat disc. Wrap each disc tightly in plastic wrap and refrigerate for at least one hour, or overnight if preparing ahead. If chilled overnight, let the dough sit at room temperature briefly if it is too firm to roll.
Step 7: Roll Out the Dough
Lightly flour your work surface and rolling pin. Roll one portion of dough to approximately 1/4-inch thickness, keeping the thickness as even as possible. Keep the second portion refrigerated until you are ready to use it.
Step 8: Cut the Christmas Shapes
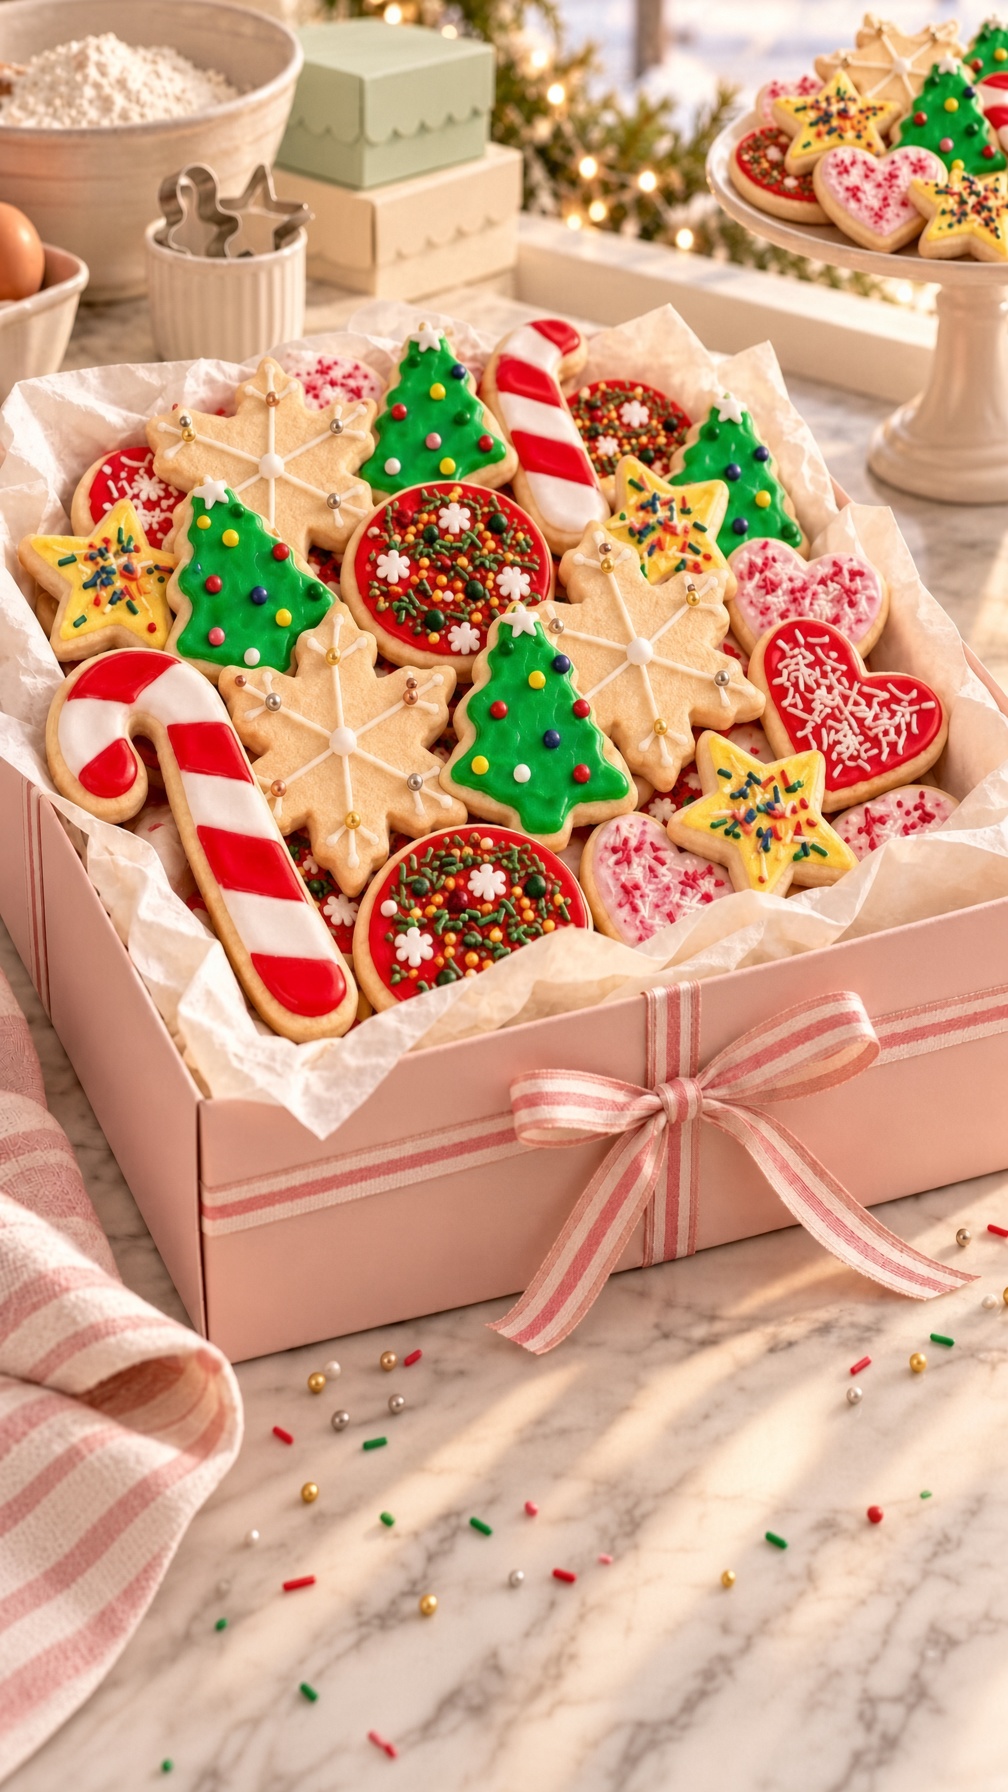
Use festive cookie cutters to cut Christmas trees, snowflakes, stars, candy canes, hearts, and rounds. Carefully transfer the shapes to the prepared baking sheets, leaving about 1–2 inches between them. Gather any scraps, gently press them together, and reroll the dough as needed.
Step 9: Bake the Cookies
Bake for 8–10 minutes, checking the cookies toward the end of the baking time. They are ready when the edges are just lightly golden and the centers remain pale. Larger or smaller shapes may require slightly different baking times, so keep an eye on each batch.
Step 10: Cool the Cookies
Remove the baking sheets from the oven and let the cookies rest for 5 minutes. Transfer them carefully to a wire rack and allow them to cool completely before decorating.
Step 11: Prepare the Decorating Icing
Prepare royal icing or your preferred cookie decorating icing according to its instructions. Divide the icing into small bowls and tint each portion with food coloring. Red, green, white, and yellow are classic Christmas colors, but you can choose any palette you like.
Step 12: Decorate the Cookies
Spread or pipe the icing onto the cooled cookies. Decorate Christmas trees with green icing and colorful dots, add white snowflakes to red or blue rounds, create stripes on candy canes, and sprinkle sanding sugar over stars for a sparkling finish. Add sprinkles and candy decorations while the icing is still wet so they adhere properly.
Step 13: Let the Icing Set
Arrange the decorated cookies on a flat surface and allow the icing to dry according to the icing recipe’s instructions. Royal icing may need several hours to set completely, depending on its thickness and the humidity. Once dry, the cookies are ready to serve, package, or share.
Description
Christmas Sugar Cookies are buttery, tender, and delicately sweet, with a classic vanilla flavor and a hint of almond. Their smooth, pale surfaces make them ideal for colorful holiday decorations, while their firm structure helps the festive shapes remain recognizable after baking. These cookies can be decorated as simply or elaborately as you like. A few sprinkles and colored sugar create an easy finish, while royal icing allows more detailed designs. The recipe is versatile enough for family baking days, Christmas parties, cookie exchanges, and homemade holiday gifts.
Nutritional Information
The following values are approximate and apply to one undecorated cookie, assuming the recipe makes about 24 medium-sized cookies. The actual values will vary depending on the size of the cutters and the amount of icing and decorations used.
- Calories: 125–145 kcal
- Total fat: 6–7 g
- Saturated fat: 4 g
- Carbohydrates: 16–19 g
- Sugars: 7–9 g
- Protein: 1–2 g
- Sodium: 75–110 mg
Decorating icing, candy, and additional sugar will increase the calories and sugar per cookie. Smaller cookie cutters are a simple way to create bite-sized portions for a large holiday platter.
Conclusion
Christmas Sugar Cookies are a timeless holiday treat that combines simple ingredients, buttery flavor, and endless decorating possibilities. The chilled dough rolls out beautifully, making it easy to create festive shapes that bake into tender cookies with lightly golden edges. Whether you decorate them with intricate royal icing or keep them simple with colorful sprinkles, these cookies bring a cheerful touch to the holiday season. Prepare a batch for a Christmas celebration, share them with neighbors, or make decorating an enjoyable activity for the whole family.
Recommendation
Serve these cookies with hot chocolate, coffee, tea, or a glass of milk. They also make lovely additions to Christmas dessert tables alongside gingerbread cookies, brownies, fudge, and other holiday favorites. For edible gifts, allow the icing to dry completely before placing the cookies in a decorative tin or food-safe gift box. Separate layers with parchment paper to protect the decorations. If you want to prepare ahead, the unbaked dough can be refrigerated overnight, making it easy to bake and decorate the cookies when you have time.
Embracing Healthful Indulgence
Holiday baking is about enjoyment, creativity, and sharing traditions. These sugar cookies are a sweet treat, and their size and decorations can be adjusted to suit your preferences. Using smaller cookie cutters allows you to make more portions, while a lighter layer of icing keeps the focus on the buttery cookie itself. You can also enjoy the decorating process by making a variety of designs and sharing the finished cookies with family and friends. A balanced approach allows you to enjoy festive desserts while appreciating the memories and traditions that make holiday baking special.