
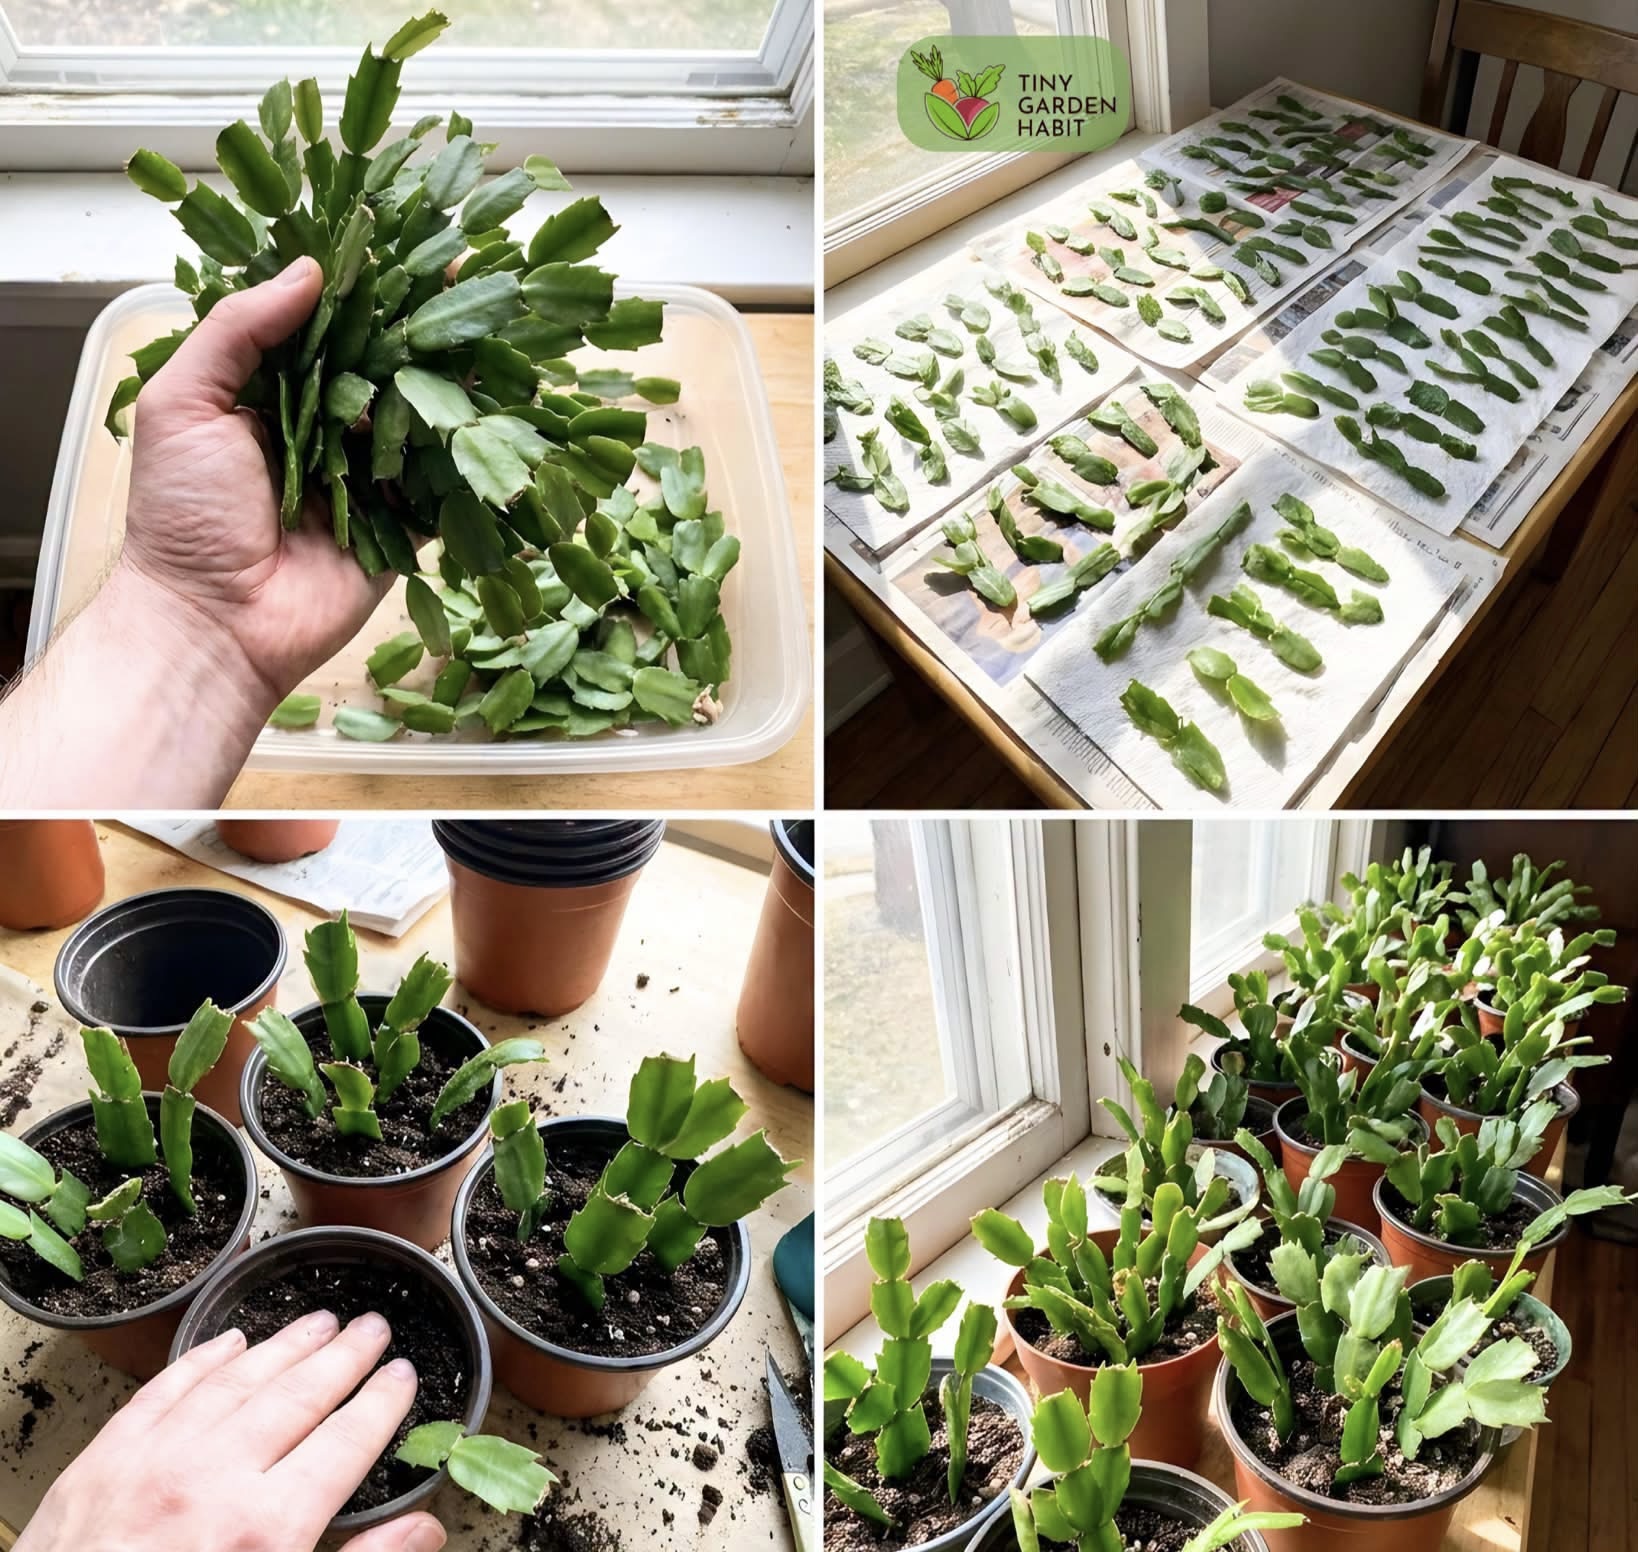
A Step-by-Step Guide
Want more Christmas cactus plants without buying new ones? The good news is that propagating a Christmas cactus from stem cuttings is a simple and rewarding gardening project. With a healthy parent plant, the right rooting medium, and a little patience, you can grow several new plants at home.
Christmas cactus plants are popular houseplants known for their beautiful seasonal flowers and distinctive segmented stems. Propagating them allows you to expand your houseplant collection, share plants with friends, or grow new specimens from a favorite mature plant.
Although October can be a convenient time to propagate Christmas cactus indoors, you do not have to wait until fall. The most important factors are healthy cuttings, suitable moisture levels, warmth, and bright indirect light.
In this guide, you’ll learn how to propagate a Christmas cactus step by step, how to care for your cuttings, how long rooting takes, and which common mistakes to avoid.
Can You Propagate a Christmas Cactus From Cuttings?
Yes! Christmas cactus plants can be propagated using sections of their flattened green stems.
Each cutting contains connected stem segments. When the cutting is prepared and planted correctly, it can develop roots and eventually grow into a new plant.
For beginners, stem-cutting propagation is one of the easiest ways to multiply a Christmas cactus because it does not require seeds or specialized equipment.
According to Iowa State University Extension and Outreach, holiday cacti can be propagated by removing two to five stem segments at a joint, allowing the cut ends to callus overnight, and planting the cuttings in a suitable rooting medium. Roots typically develop within six to eight weeks under appropriate conditions.
When Is the Best Time to Propagate a Christmas Cactus?
Christmas cactus cuttings can be propagated at different times of the year when indoor conditions are suitable.
Spring and early summer are often convenient because the plant is entering or experiencing active growth. However, October can also work if you can provide adequate warmth, light, and consistent care indoors.
Before taking cuttings, consider the condition of your plant.
Choose a healthy parent plant with firm, green segments. Avoid plants that show signs of severe dehydration, pests, disease, or root rot.
If your plant is covered in flower buds or currently blooming, consider waiting until flowering finishes before taking cuttings. This helps you avoid disturbing the plant during an important stage of its seasonal growth.
Gardening tip: You do not need to remove dozens of stems from one plant. A few healthy cuttings are enough to get started.
What You Need to Propagate a Christmas Cactus
Gather these supplies before you begin:
- A healthy Christmas cactus parent plant
- Clean hands or clean gardening tools
- Small pots or propagation containers with drainage holes
- Perlite or coarse sand for rooting
- Suitable potting mix for holiday cacti when transplanting
- A small watering can or spray bottle
- A bright location with indirect light
You do not necessarily need rooting hormone. Christmas cactus cuttings can root successfully without it when the basic growing conditions are suitable.
Choose containers that allow excess water to drain freely. Containers without drainage holes can leave the rooting medium too wet and increase the risk of rot.
Step-by-Step: How to Propagate a Christmas Cactus
Step 1: Choose a Healthy Parent Plant
Start with a healthy, established Christmas cactus.
Look for firm, green stem segments without mushy areas, suspicious spots, or signs of pests. Healthy cuttings generally have a better chance of establishing roots than damaged or weakened ones.
Avoid taking cuttings from stems that are severely wrinkled, yellowing from stress, or showing signs of rot.
If your plant has long stems, select a few suitable sections while leaving plenty of healthy growth on the parent plant.
Step 2: Take Stem Cuttings
Identify the joints connecting the flattened stem segments.
Gently twist off a section containing approximately two to five connected segments. You can also use clean scissors or pruning snips if you prefer.
Handle the cuttings carefully to avoid crushing or damaging the segments.
Place the cuttings on a clean surface after removing them from the parent plant.
Important: Keep track of which end was attached to the parent plant. Planting the cutting upside down can prevent successful rooting.
Step 3: Let the Cut Ends Callus
Allow the cut ends to dry overnight in a clean, dry location away from harsh direct sunlight.
This drying period allows a protective callus to form over the wound. It can help reduce the risk of the cut end rotting after planting.
You do not need to leave the cuttings drying for several days in a hot or sunny location. Excessive drying can dehydrate them.
Once the cut ends have had time to callus, you can prepare them for planting.
Step 4: Prepare the Rooting Medium
Christmas cactus cuttings need a rooting medium that holds some moisture while allowing excess water to drain.
A simple option is perlite or coarse sand, following the approach recommended by Iowa State University Extension. These materials provide a suitable environment for root development when managed correctly.
Prepare small containers with drainage holes.
Moisten the rooting medium and allow excess water to drain before inserting the cuttings. The medium should be moist rather than saturated.
Avoid using heavy garden soil that compacts easily or remains waterlogged.
Step 5: Plant the Cuttings
Make a small hole in the rooting medium and insert the cut end approximately one inch deep.
Keep the cutting upright and gently firm the medium around its base so it does not fall over.
Leave enough of the cutting above the surface for the remaining stem segments to receive light.
You can place several cuttings in one larger propagation container, provided they have enough space. Alternatively, use separate small pots so each cutting can be handled independently.
Label the containers with the propagation date if you want to track their progress.
Step 6: Provide Bright, Indirect Light
Place the newly planted cuttings in a bright location that receives indirect light.
A bright windowsill can work well, provided the cuttings are protected from harsh direct afternoon sunlight and extreme temperature changes.
Avoid placing the pots next to cold drafts, heating vents, or other locations with rapidly changing temperatures.
Christmas cactus plants are adapted to filtered light rather than the intense, dry conditions preferred by many desert cacti.
Maintaining suitable light and temperature helps support healthy rooting.
Step 7: Water Carefully
Water management is especially important during propagation.
The rooting medium should remain lightly moist, but it should never stay saturated for long periods.
Check the medium regularly and water when it begins to dry. The exact frequency depends on room temperature, humidity, the container, and the rooting medium.
Do not automatically water every cutting on a rigid daily schedule. Check the actual moisture level first.
Always allow excess water to drain away, and never leave the pots sitting in standing water.
Common mistake: Adding more water whenever a cutting looks slightly limp without checking the medium. Limpness can have several causes, including dehydration and root problems.
Step 8: Wait for Root Development
Rooting takes patience.
Under suitable conditions, Christmas cactus cuttings commonly develop roots in approximately six to eight weeks, although timing can vary.
Avoid repeatedly pulling the cuttings out of the medium to check for roots. This can disturb developing roots and slow establishment.
Instead, watch for signs that the cutting is settling into its new environment. It may remain fairly unchanged for a while before producing fresh growth.
Remember that new stem growth and root development do not always happen at exactly the same time.
Step 9: Transplant the Rooted Cuttings
Once the roots are approximately one inch long or longer, the cuttings can be transplanted into individual pots containing a well-draining potting mix suitable for holiday cacti.
Handle the young plants gently to avoid damaging the roots.
Choose pots with drainage holes. You generally do not need an excessively large container for a small rooted cutting.
After transplanting, water appropriately and return the plants to bright, indirect light.
Give the young plants time to adjust before making major changes to their environment.
Step 10: Continue Caring for Your New Plants
Once established, young Christmas cactus plants need consistent but not excessive care.
Follow these basic guidelines:
- Light: Provide bright, indirect light.
- Water: Water when the potting mix has begun to dry, avoiding prolonged saturation.
- Drainage: Use pots with drainage holes and empty excess water from saucers.
- Temperature: Keep the plants in a comfortable indoor environment, away from cold drafts and extreme heat.
- Fertilizer: Wait until the cuttings are rooted and growing before beginning a light feeding routine appropriate for holiday cacti.
With time, the new plants can develop into fuller specimens. Flowering may take longer and depends on plant maturity and suitable seasonal conditions.
Common Mistakes to Avoid When Propagating Christmas Cactus
Even though Christmas cactus propagation is relatively easy, a few mistakes can reduce your success rate.
1. Planting Cuttings Immediately After Breaking Them Off
Fresh wounds can be vulnerable to rot in overly wet conditions. Let the cut ends callus overnight before planting.
2. Using Waterlogged Soil
Excess moisture can cause the cuttings to rot before they establish roots.
Use a well-draining rooting medium and containers with drainage holes.
3. Burying the Cuttings Too Deeply
A cutting does not need to be buried entirely. Inserting the cut end about one inch deep is generally sufficient.
4. Placing Cuttings in Harsh Direct Sunlight
Strong direct sunlight can stress or dehydrate the cuttings.
Choose a bright location with indirect light.
5. Overwatering
More water does not mean faster rooting. Keep the rooting medium lightly moist and allow excess water to drain away.
6. Checking for Roots Too Often
Repeatedly removing cuttings from the medium can damage developing roots.
Give the cuttings several weeks to establish before checking their progress.
7. Transplanting Too Early
Very young cuttings may not yet have enough roots to handle transplanting easily.
Wait until the roots are established, ideally around one inch long or longer.
Can You Propagate Christmas Cactus in Water?
Christmas cactus propagation is commonly done in a suitable rooting medium, such as perlite or coarse sand.
Some gardeners experiment with water propagation, but the process and results can differ from rooting directly in a solid medium.
If you are a beginner, using a well-draining rooting medium is a straightforward method supported by university extension guidance.
Whichever method you choose, avoid leaving the cut ends in conditions that encourage rot.
How Long Does It Take for Christmas Cactus Cuttings to Root?
Christmas cactus cuttings generally take about six to eight weeks to develop roots under suitable conditions.
The exact timing can vary depending on the cutting’s health, temperature, light, and moisture levels.
If your cuttings have not rooted after several weeks, resist the temptation to disturb them repeatedly. Instead, review the growing conditions and check for signs of rot.
Healthy cuttings that remain firm and green may simply need more time.
Frequently Asked Questions
Can I propagate a Christmas cactus in October?
Yes. October can be a suitable time to propagate Christmas cactus indoors if you can provide warmth, bright indirect light, and appropriate moisture. Spring and early summer are also convenient propagation periods.
How many segments should a Christmas cactus cutting have?
A cutting containing two to five connected stem segments is a good starting point. Take sections from healthy growth and handle them gently.
Do Christmas cactus cuttings need to dry before planting?
Yes. Allow the cut ends to callus overnight before planting. This helps protect the wounds in the rooting medium.
How deep should Christmas cactus cuttings be planted?
Insert the cut end approximately one inch into the rooting medium. Keep the cutting upright and avoid burying it too deeply.
How often should I water Christmas cactus cuttings?
Check the rooting medium regularly and water when it begins to dry. Keep it lightly moist rather than waterlogged. Watering frequency depends on your indoor conditions.
Can I propagate a Christmas cactus from a single segment?
A single segment may be able to root, but using a cutting containing two to five connected segments follows the method recommended by Iowa State University Extension.
Why are my Christmas cactus cuttings rotting?
Rot can occur when the medium stays too wet, drainage is poor, or the cuttings are damaged. Use clean containers, allow the cut ends to callus, and avoid waterlogged conditions.
When can I transplant Christmas cactus cuttings?
Transplant them once they have developed established roots, approximately one inch long or longer. Handle the young roots gently and use a well-draining potting mix.
Final Thoughts
Learning how to propagate a Christmas cactus is a wonderful way to grow your collection without purchasing additional plants.
Start with healthy stem cuttings, allow the cut ends to callus overnight, plant them in a suitable rooting medium, and provide bright indirect light with careful watering.
The most important ingredient is patience. Rooting usually takes several weeks, but with the right conditions, a few small cuttings can become healthy new plants.
Have a Christmas cactus at home? Save this guide for your next propagation project and share it with a friend who loves houseplants!