
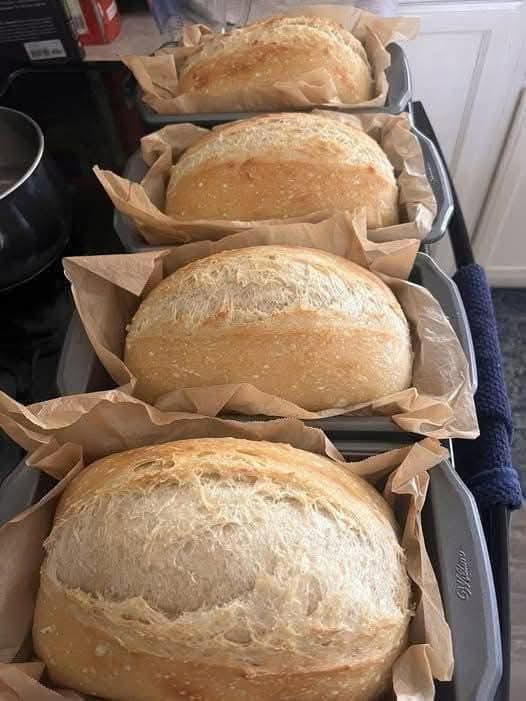
This soft homemade sandwich bread is one of the easiest bread recipes to make at home. It requires no kneading, no eggs, and no butter, yet produces a light, fluffy loaf with a tender crumb and a beautifully golden crust.
With only a handful of basic ingredients, we can prepare fresh bread without a stand mixer or complicated techniques. The dough is intentionally sticky, so there is no need to add large amounts of extra flour or spend time kneading.
🧾 Ingredients
- 3 ½ cups (440g) all-purpose flour
- 1 ½ cups (360ml) warm water
- 2 teaspoons sugar
- 1 ½ teaspoons salt
- 2 ¼ teaspoons (1 packet) instant yeast
👩🍳 Instructions
1. Prepare the Yeast
In a large mixing bowl, pour in the warm water and add the sugar and instant yeast. Stir gently until everything is well combined.
Let the mixture rest for 5–10 minutes. If using active dry yeast instead of instant yeast, a light layer of foam on the surface indicates that the yeast is active and ready to use.
The water should feel comfortably warm to the touch, not hot. Excessively hot water can interfere with the yeast and prevent the bread from rising properly.
2. Mix the Dough
Add the all-purpose flour and salt to the bowl. Using a wooden spoon, spatula, or sturdy spoon, mix everything together until no large pockets of dry flour remain.
The dough will be soft, sticky, and somewhat shaggy. This is completely normal for a no-knead bread recipe. Avoid adding too much additional flour because doing so can make the finished loaf heavy and dry.
Simply mix until the ingredients are evenly incorporated.
3. Let the Dough Rise
Cover the bowl tightly with plastic wrap, a lid, or a clean kitchen towel.
Place the bowl somewhere warm and draft-free and allow the dough to rise for approximately 1 hour, or until it has noticeably increased in volume and is close to double its original size.
The exact rising time can vary depending on the temperature of your kitchen. A warmer environment will usually make the dough rise faster, while a cooler kitchen may require additional time.
4. Prepare the Loaf Pan
Lightly grease a standard loaf pan with a little oil or nonstick cooking spray.
Once the dough has finished its first rise, gently stir or deflate it just enough to make it easier to handle. Do not aggressively work the dough.
Transfer it carefully into the prepared loaf pan.
5. Shape the Dough
Because the dough is sticky, use a lightly greased spatula or slightly wet hands to smooth the surface.
Try to distribute the dough evenly from one end of the pan to the other. The loaf does not need to look perfect at this stage because it will continue rising and develop its shape during the second proof.
6. Allow the Second Rise
Cover the loaf pan loosely and let the dough rise again for approximately 30 minutes.
The dough should become visibly puffy and rise toward the top of the pan. If your kitchen is particularly cool, it may take a little longer.
Avoid letting the dough rise excessively, because over-proofing can cause the loaf to collapse during baking.
7. Bake the Bread
Preheat the oven to 375°F (190°C).
Once the dough has completed its second rise, place the loaf pan in the center of the preheated oven.
Bake for 30–35 minutes, or until the top is beautifully golden brown and the loaf sounds hollow when lightly tapped.
If the top begins browning too quickly while the center still needs more time, loosely cover the loaf with aluminum foil for the remaining baking time.
8. Cool the Loaf
Remove the bread from the oven and allow it to rest in the pan for approximately 5–10 minutes.
Carefully remove the loaf from the pan and transfer it to a wire rack.
Allow the bread to cool completely before slicing. Although it can be tempting to cut into the warm loaf immediately, cooling allows the interior to finish setting and helps produce cleaner slices.
🥪 How to Serve No-Knead Sandwich Bread
This homemade bread is incredibly versatile and can be enjoyed in many different ways.
Use thick slices to prepare turkey or chicken sandwiches, grilled cheese, tuna sandwiches, breakfast toast, or simple buttered toast. The soft texture also makes it excellent for peanut butter and jelly sandwiches.
For breakfast, toast slices until lightly crisp and serve them with jam, honey, peanut butter, or your favorite spread.
The bread also works beautifully alongside soups, stews, pasta dishes, roasted chicken, and casseroles, making it useful far beyond breakfast and lunch.
💡 Tips for Soft and Fluffy Bread
Measure the flour carefully. Too much flour is one of the easiest ways to end up with a dense loaf. Using a kitchen scale is the most accurate method, but if measuring with cups, spoon the flour into the measuring cup and level it rather than packing it down.
Don’t make the water too hot. Warm water encourages the yeast to work efficiently, while very hot water can negatively affect the yeast.
Don’t add excessive flour. The dough is supposed to be sticky. A sticky dough is part of what makes this recipe so easy and helps contribute to a softer crumb.
Give the dough enough time to rise. Rising time depends heavily on room temperature. Instead of relying only on the clock, look at the dough and wait until it has visibly expanded.
Let the bread cool completely. Cutting the loaf while it is extremely hot can make the inside appear gummy or compressed.
🧊 Storage
Once completely cooled, store the bread in an airtight container or bread bag at room temperature for approximately 3 days.
For longer storage, slice the loaf and freeze the slices in a freezer-safe bag. Individual slices can then be removed as needed and toasted directly from frozen.
For the freshest texture, avoid storing homemade bread uncovered because exposure to air will cause it to dry out more quickly.
🍞 Why This Recipe Works
The combination of flour, water, yeast, sugar, and salt creates a simple yeast dough without the need for eggs, butter, or other rich ingredients.
The extended resting periods allow the yeast to develop the dough naturally, while the high moisture content keeps the finished bread tender.
Most importantly, this method eliminates traditional kneading. Instead of developing the dough through extensive manual work, we allow time and fermentation to do much of the work for us.
📋 Recipe Information
Prep Time: 10 minutes
First Rise: 1 hour
Second Rise: 30 minutes
Baking Time: 30–35 minutes
Total Time: Approximately 2 hours 15 minutes
Yield: 1 loaf
Difficulty: Easy
🍞 Final Result
The result is a soft, fluffy, homemade sandwich bread with a delicate golden crust and a tender interior. It is simple enough for beginners while being practical enough to become an everyday bread recipe.
With no kneading, no eggs, and no butter, this recipe is an excellent way to enjoy fresh homemade bread using ingredients that are likely already sitting in the pantry.